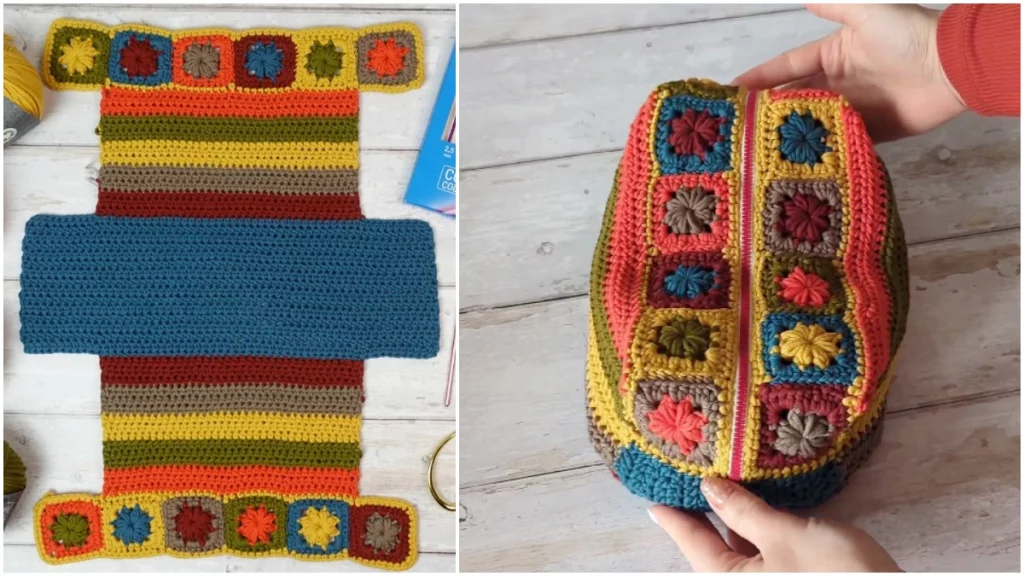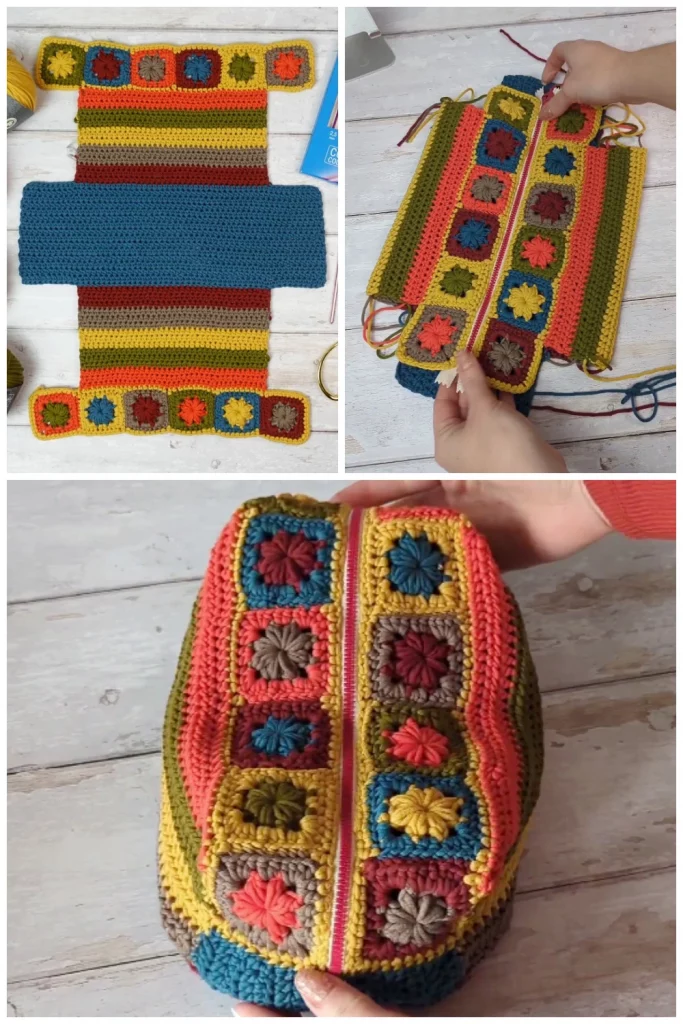
Today I will show you How to Crochet Makeup Bag with zipper Using the Easiest Method. It’s Beginner friendly tutorial, you will not believe this. They’re really not as hard as you might think! If you’ve ever wondered how to crochet Makeup Bag, then you’ve come to the right place.
I call these patterns “basics” because they are simple and quick, unembellished patterns that are perfect for learning, teaching, selling or gifting. If you never made or couldn’t make bags before! Now you will!
Materials:
- Yarn (medium weight, 100% cotton)
- Crochet hook (size 5.5 mm)
- Wooden bag handles
- Tapestry needle
- Scissors
Crochet Makeup Bag Instruction:
Start by crocheting a chain that is the length of the wooden handles. Join the chain together to form a ring, and then crochet a few rounds of single crochet stitches to create the base of the bag.
Next, work in the round to crochet the sides of the bag. You can use any stitch pattern you prefer, but the video uses a combination of single crochet and chain stitches to create a mesh-like texture.
Continue crocheting in the round until the bag is the desired height. Make sure to crochet a few extra rounds at the end to create a sturdy top edge for the bag.
Once the bag is complete, attach the wooden handles using a tapestry needle and yarn. Make sure to securely sew the handles onto the bag on both sides.
Weave in any loose ends and trim any excess yarn.

You may also like these Easy Method Crochet Projects:
How to Join Crochet Squares ?
Join the squares together by slip-stitching them on the wrong side using a coordinating color yarn and a crochet hook. Insert the hook through both loops of the first stitch on the first square and then through both loops of the first stitch on the second square. Yarn over and pull through both loops on the hook. Continue slip-stitching across the sides of both squares until they are joined together.
Once all squares have been joined together, use the coordinating color yarn and a tapestry needle to sew in any loose ends and weave in any tails.
Alternatively, you can also whip stitch the squares together on the right side of your work. Insert your needle through the front loop of the first stitch on the first square, then through the front loop of the first stitch on the second square, and continue whip stitching across both squares.
Another option is to use a single crochet stitch to join the squares together. Insert your hook into the corner stitch of the first square, then single crochet across the sides of both squares until you reach the corner stitch of the second square. Single crochet into that stitch and continue to single crochet across the sides of both squares until they are joined together.
Crochet Makeup Bag Using the Easiest Method
Follow Crochet-Kingdom.com on your favorite social media – Pinterest – Facebook – Instagram
Well I am here to take the frustration out of searching for your next pattern. I like to find and show you these independent designers and bring their fabulous projects to you. Please always visit and thank the individual designers for their generosity.
Happy Crocheting to you !
